This guide will show you how to install third-party modules into your Odoo environment using GitHub. You'll learn two methods: one using your web browser directly on github.com, and another using the GitHub Desktop application. Both methods accomplish the same goal — choose whichever feels more comfortable for you. The entire process takes about 5-10 minutes.
Before you Begin
- You'll need access to a GitHub account that has your Odoo repository
- Make sure you're signed into this GitHub account at github.com
- Have your third-party module downloaded and unzipped on your computer
(Most Odoo modules download as .zip files. Right-click → Extract All on Windows, or double-click on Mac) - Know the technical name of the module you're installing
- For GitHub Desktop method only: Download and install GitHub Desktop
What's in this guide:
Method 1: Installing via GitHub
- Step 1: Sign in & locate repository
- Step 2: Create a new branch
- Step 3: Upload the module
Method 2: Installing via GitHub Desktop
- Step 1: Sign in to GitHub Desktop
- Step 2: Clone repository
- Step 3: Create branch
- Step 4: Add module files
- Step 5: Commit the changes
- Step 6: Push to GitHub
Choose the method that works best for you — both accomplish the same goal.
Installing via GitHub
Use this method if you prefer working in your web browser. No additional software required — everything is done directly on github.com.
1 - Sign in to GitHub and locate your Odoo repository
Go to github.com and sign in with the account that has access to your Odoo environment. Once logged in, click on your profile icon in the upper right, select "Your repositories" from the dropdown, and find your Odoo repository.
Your repository is where all your Odoo code is stored. Think of it like a shared folder that connects GitHub with your Odoo.sh environment.
2 - Create a new branch
Use the module's technical name as the branch name for clarity. Choose one of the two methods below.
- Select the branch dropdown in the upper left
- Enter your new branch name in the search field
- Click "Create branch"
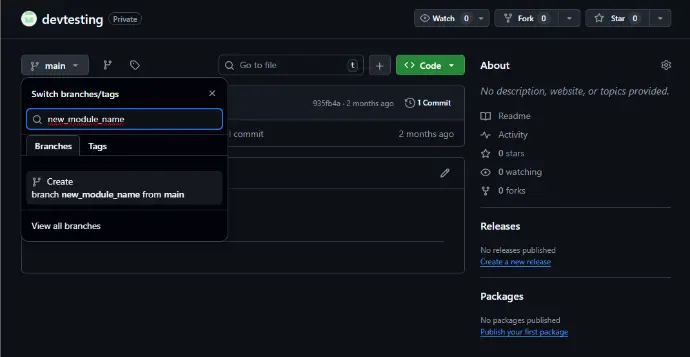
GitHub - branch dropdown with create option

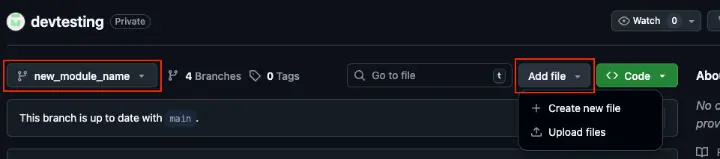
New branch now selected in repository
A branch is like a separate workspace where you can make changes without affecting your live site. This keeps your main Odoo environment running while you test new modules.
3 - Upload the module to GitHub
Make sure you are on the correct branch. Click the "Add file" dropdown (may appear as "+" depending on your screen size) and select "Upload files".
Drag and drop the unzipped module folder, or click "choose your files". Add a commit message, or leave the default "Add files via upload". Click "Commit changes".
 GitHub - uploading files and committing changes
Once committed, the branch in Odoo.sh will automatically begin to rebuild.
📌What's next?
You've successfully uploaded your module files to GitHub and Odoo.sh has rebuilt your branch. Now you need to test the module and deploy it to your production environment.
Continue to Part 2: How to Install a Third-Party Module in Odoo: Part 2 - Testing and Deployment (coming soon)
In Part 2, you'll learn how to:
- Activate the module in your development branch
- Test the module functionality
- Move the module to staging for validation
- Deploy to production safely
Installing via GitHub Desktop
Use this method if you prefer a visual desktop application or plan to install modules frequently. Requires installing GitHub Desktop software on your computer.
Before starting, make sure you have GitHub Desktop installed on your computer.
1 - Sign in to GitHub Desktop
Open GitHub Desktop on your computer. If this is your first time using it, click Sign in to GitHub.com and follow the prompts to sign in with your GitHub account credentials. Once signed in, GitHub Desktop will be connected to your GitHub repositories.
You only need to sign in once. GitHub Desktop will remember your login for future use.
2 - Clone your Odoo Repository
Click File → Clone Repository. Select your Odoo repository from the list and choose a local folder to save it to. Click Clone.
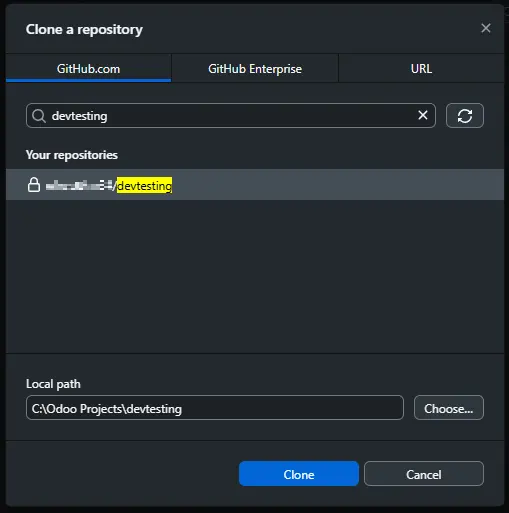
Cloning creates a local copy of your repository on your computer, allowing you to work with files directly without using a web browser.
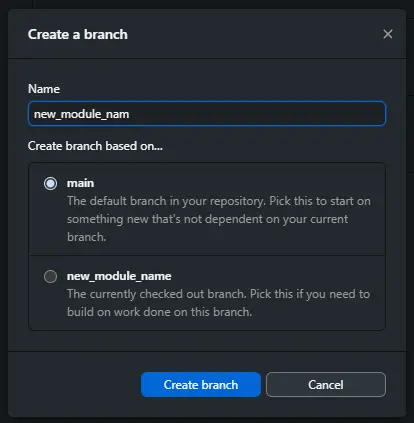
3 - Create a new branch
In GitHub Desktop, click the Current Branch dropdown at the top.
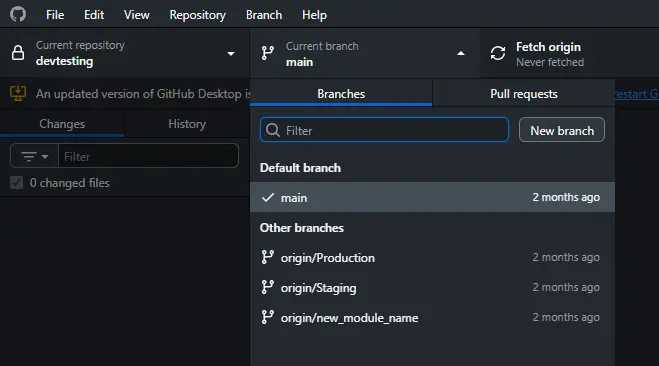
Click New Branch. Name it using the module's technical name for clarity. Click Create Branch.
4 - Add the module to your local repository
To add your module files to the repository:
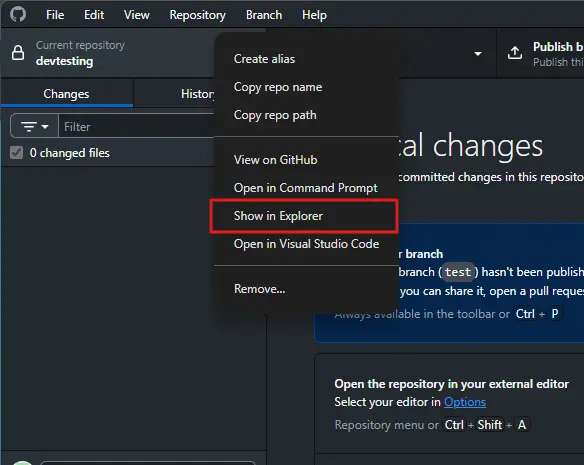
- In GitHub Desktop, right-click on the repository name in the left sidebar
- Select "Show in Explorer" (Windows) or "Show in Finder" (Mac)
- The folder containing your repository will open
- Open a second File Explorer/Finder window and navigate to where you saved your unzipped module folder
- Copy the module folder and paste it into the root of your repository folder
The repository folder is your local copy of the code. Any files you add here will be tracked by GitHub Desktop and can be uploaded to GitHub.
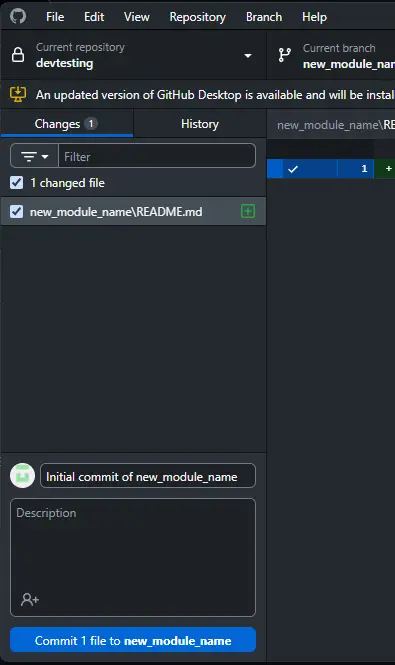
5 - Commit the changes
Back in GitHub Desktop, you will see the new module files listed under Changes. Add a summary in the commit message field at the bottom left (e.g., "Add [module name] module"). Click Commit to [branch name].
6 - Push to GitHub
Click Publish branch in the center of the window to upload your changes to GitHub. The branch will now appear in your GitHub repository and Odoo.sh will automatically begin to rebuild.
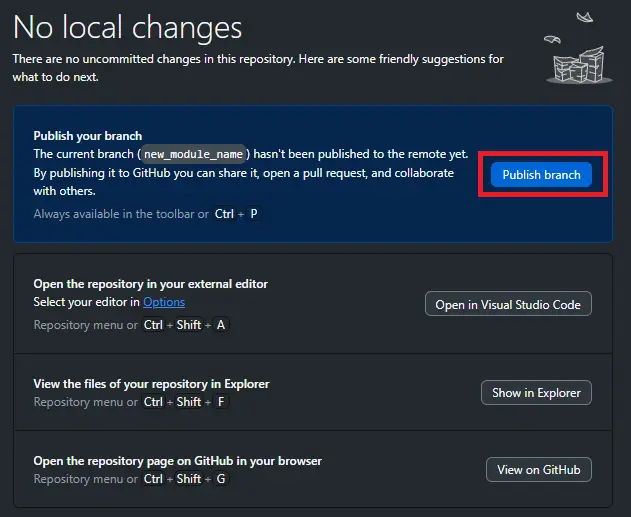
Your module is now installed! Once Odoo.sh finishes rebuilding the branch, the module will be available to activate in your Odoo environment.
📌What's next?
You've successfully uploaded your module files to GitHub and Odoo.sh has rebuilt your branch. Now you need to test the module and deploy it to your production environment.
Continue to Part 2: How to Install a Third-Party Module in Odoo: Part 2 - Testing and Deployment
In Part 2, you'll learn how to:
- Activate the module in your development branch
- Test the module functionality
- Move the module to staging for validation
- Deploy to production safely